Before spending time hunting a leak's precise location, it pays to answer two simpler questions: is water actually escaping, and which pipe is it escaping from?Pipeline pressure testing answers both. Sections of pipe are isolated with valves, pressurized in a controlled way, and monitored with gauges, a pressure drop with no fixtures in use means water is leaving that section somewhere.
Think of it as the diagnostic foundation every other method builds on. Acoustic listening, thermal imaging, and tracer gas all pinpoint leaks brilliantly, but they work fastest and most accurately when a pressure test has already narrowed the search to the right line. In Alhambra's older homes with sprawling, modified-over-decades plumbing, that narrowing step saves real time.
Last updated: October 13, 2026
Signs You May Need Pipeline Pressure Testing
Your water meter moves during a no-use test but no leak is visible
You need to know whether the leak is on the hot or cold side
Multiple bathrooms or zones make the leak's origin unclear
A slab-leak investigation needs the suspect line narrowed first
You want documented proof of a leak for an insurance claim
A previous pinpointing attempt failed because the wrong line was tested
What a Pressure Test Actually Does
The principle is straightforward: a sealed section of pipe should hold its pressure. The technician closes isolation valves to segment the system, hot versus cold, upstairs versus downstairs, interior versus the service line, then pressurizes each section to a test pressure appropriate for its material and watches a gauge or data logger. A steady reading means the section is sound; a falling reading means water is escaping.
For drain and sewer lines, a hydrostatic variant is used: the line is plugged and filled with water, and a dropping water level reveals the breach. Either way, the outcome is the same, confirmation plus isolation, delivered as documented readings rather than opinion.
Confirmation and Isolation, Not Pinpointing
An important expectation to set: pressure testing confirms a leak exists and narrows it to a section of pipe, but it does not mark the exact spot. Knowing the leak is on the hot-water run under the hallway, rather than somewhere in the entire house, is enormously valuable, it just isn't the final answer.
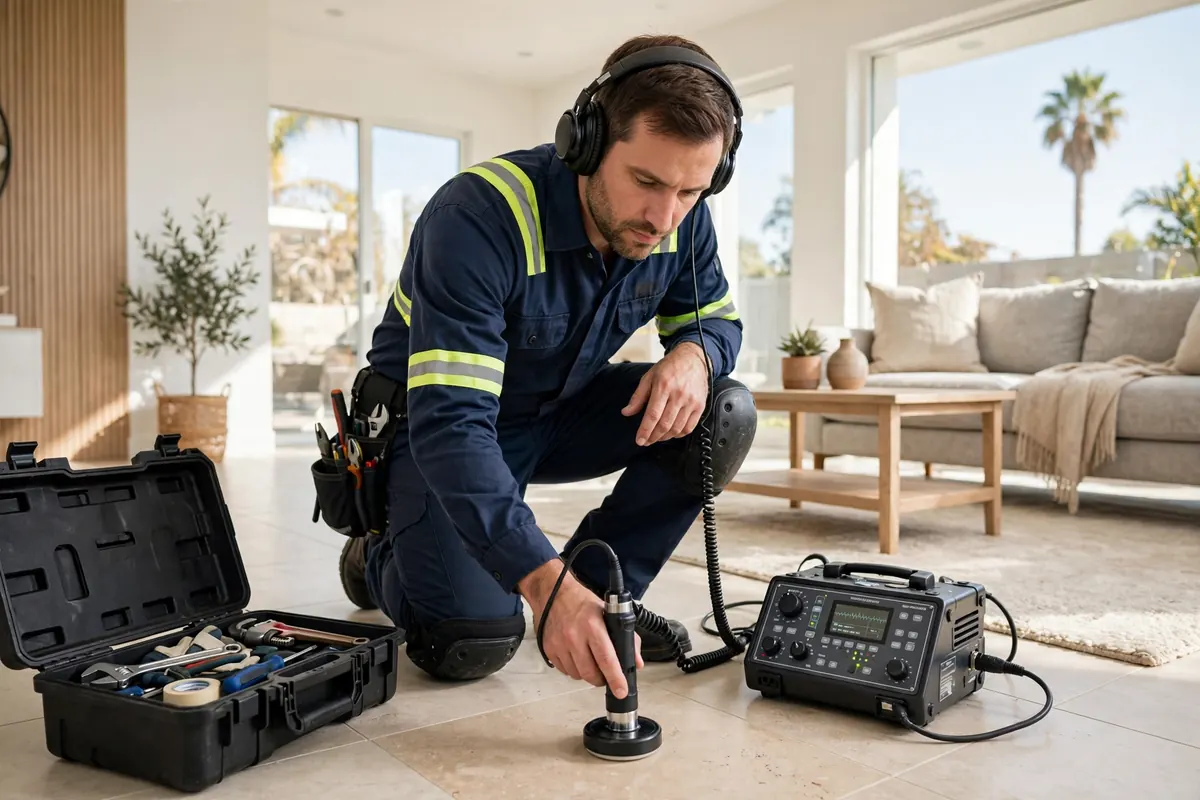
The pinpoint comes next, and the pressure test tells the technician which tool to reach for: acoustic listening for the pressurized slab line, thermal imaging for the hot-water run behind a wall, tracer gas for the elusive pinhole. Each method performs better when it starts from a confirmed, isolated section instead of a whole-house mystery.
The Standard Diagnostic Sequence
Professional leak investigations follow a disciplined order, and pressure testing sits at its center: meter check first (is water actually being lost?), then pressure testing (which section?), then pinpointing (exactly where?), then marking and reporting. Skipping the middle step is how investigations go wrong, technicians chase sounds or heat signatures on the wrong line while the real leak sits undisturbed elsewhere.
For slab-leak work specifically, the hot-versus-cold isolation is the highest-value test in the sequence. A hot-side loss points to the water heater loop; a cold-side loss points elsewhere entirely, and the repair plan differs completely between the two.
Note: This Is Not Backflow Testing
Worth clarifying because the terms sound similar: backflow testing is a separate, regulated compliance service for backflow prevention devices, with its own testers and schedules, the City of Alhambra even publishes a backflow tester referral list. It has nothing to do with finding leaks.
Likewise, this page covers residential and commercial plumbing pressure testing only, not gas-line pressure testing, which is a separate safety-regulated matter. If what you need is leak confirmation on your water lines, you are in the right place.
Our Pipeline Pressure Testing Process
Meter and visual check
We confirm water is actually being lost and note the system's layout, materials, and valve locations.
System segmentation
Isolation valves divide the plumbing into testable sections, hot vs. cold, interior vs. service line.
Controlled pressurization
Each section is pressurized to a material-appropriate test pressure and allowed to stabilize.
Monitored hold
Gauges or data loggers track each section over time; a pressure drop with no usage proves a leak in that section.
Pinpoint handoff
The confirmed section is handed to the pinpoint method, acoustic, thermal, or tracer gas, with a documented starting point.
How pinpointing changes the job: 5 illustrative examples
The examples below are illustrative. They show how pinpointing typically changes a job. They are not reports of specific customer jobs, and they name no customer, address, date, or price.
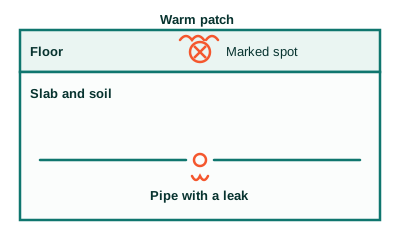
1. A warm spot on the floor
Illustration: Slab cross-section with one marked spot
Before: A homeowner notices one warm patch on the floor and a bill that keeps climbing, but no visible water. Without instruments, the only way to find the leak would be to open large areas of flooring and guess.
Method: The technician checks the meter, isolates the hot-water line, then combines thermal imaging with acoustic listening to follow the heat and sound to one point.
After: The leak is marked on the floor at one spot. Any repair opens that spot only, and the rest of the floor stays intact.
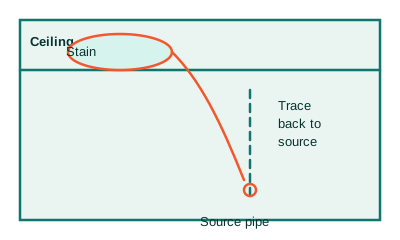
2. A stain on the ceiling
Illustration: Ceiling stain traced back to its source line
Before: A brown stain spreads across a ceiling, but the pipe above it may run several feet away. Opening the ceiling at the stain alone often misses the source and means opening more drywall later.
Method: The technician maps the damp area with thermal imaging and moisture readings, then checks pressure and nearby lines to trace the water back to its source.
After: The source line is identified and marked. Any opening is made where the leak actually is, not where the stain happens to show.
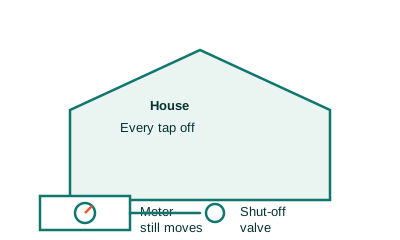
3. A meter that moves with everything off
Illustration: Meter test with every tap off
Before: Every tap is off, yet the water meter still moves. That proves water is leaving the system somewhere, but it says nothing about where. Digging or opening walls at this point would be pure guesswork.
Method: The technician runs a timed meter test, then isolates lines one by one with pressure checks to narrow the loss to a single line.
After: The search area shrinks from the whole property to one line. Pinpointing then focuses on that line only, before anything is opened.
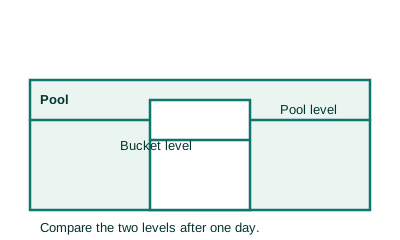
4. A pool that keeps losing water
Illustration: Bucket test comparing pool and bucket levels
Before: A pool loses water faster than normal, but some loss is normal evaporation. Draining the pool or digging up pipes without a test would waste water and money.
Method: The technician runs a bucket test to separate evaporation from a real leak, then pressure tests each line on its own to find which line loses pressure.
After: If the pool is only evaporating, no repair is needed. If one line fails, the search narrows to that line instead of the whole pool system.
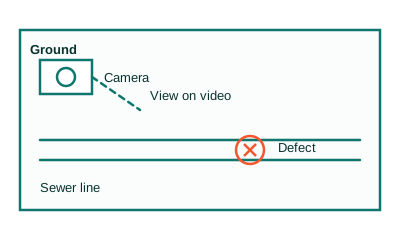
5. Slow drains and a sewer odor
Illustration: Camera inspection showing a defect inside the line
Before: Drains run slow and a sewer odor lingers, but the blockage or break could sit anywhere along the line. Digging to find it would disturb the yard and still might miss the defect.
Method: The technician sends a camera through an existing access point and watches the inside of the line on video, marking where roots, cracks, or offsets appear.
After: The defect is seen on video and its position is known. Any digging happens at that one place, after the cause is already clear.
Frequently Asked Questions
What is a pressure test on water pipes?
A section of pipe is isolated with valves, pressurized in a controlled manner, and monitored. If the pressure drops while no fixtures are in use, water is escaping from that section, confirming both the leak's existence and its general location.
What is hydrostatic testing?
The drain/sewer variant of pressure testing: the line is plugged with an inflatable ball and filled with water. A dropping water level indicates a breach in that section. It tests for a tight seal rather than pinpointing a spot.
Does pressure testing show exactly where the leak is?
No, and that is by design. Pressure testing confirms the leak and isolates it to a section of pipe (hot vs. cold, for example). Pinpointing the exact spot is the job of acoustic listening, thermal imaging, or tracer gas, which follow the pressure test.
How long does a plumbing pressure test take?
It varies with the system's size and the number of sections tested. Simple residential isolations can be completed within a single visit; larger or more complex systems take longer because each section needs its stabilization and monitoring time.
When is pressure testing recommended?
When a leak is suspected but its location is unknown, when buying an older home, after foundation work that may have stressed underground plumbing, or whenever a pinpointing method needs a confirmed starting section.
Is this the same as backflow testing?
No. Backflow testing is a regulated compliance service for backflow prevention assemblies, performed on a schedule by certified testers. Pressure testing for leak detection is a diagnostic service with a completely different purpose.