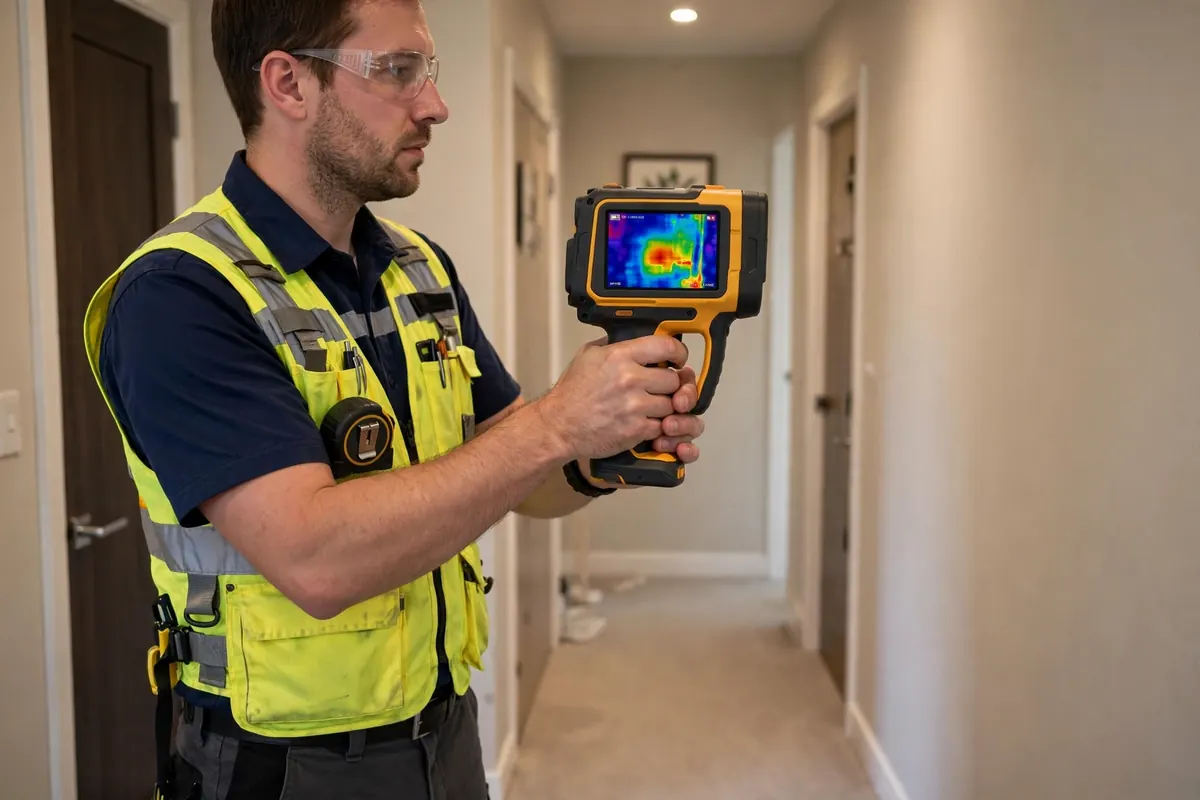
Water changes the temperature of the materials it touches. A hot-water line leak leaves a warm trail across a floor; a cold-water leak or established patch of damp shows up as a cooler area where evaporation is happening. Thermal imaging leak detection uses an infrared camera to read those surface-temperature differences, some as small as a fraction of a degree, and display them as a color-mapped image of exactly where moisture is hiding.
For Alhambra homeowners, the appeal is simple: answers without destruction. Instead of cutting exploratory holes in drywall or pulling up flooring on a guess, an infrared scan surveys whole rooms in minutes and points the investigation at the right spot. It is entirely non-contact, the camera never touches your walls, floors, or ceilings.
Last updated: October 13, 2026
Signs You May Need Thermal Imaging Leak Detection
A warm patch on a tile, wood, or concrete floor with no heating beneath it
A cool, damp-feeling area on a wall or ceiling that never fully dries
Mystery stains that grow, fade, or return with the seasons
A musty odor in a room with no visible water damage
Your water bill is up but acoustic listening found nothing conclusive
You want a whole-room survey before committing to any demolition
How Thermal Imaging Finds Hidden Leaks
Direct answer: Thermal imaging finds hidden leaks by showing temperature differences that moisture creates. An infrared camera scans walls, ceilings, and floors, and wet areas appear as cooler or warmer patches against dry surroundings. The camera shows where moisture has spread, which points back toward the source, all without contact and without opening any surface.
What thermal imaging shows, and what to pair it with
Surface or symptom
What thermal shows
Pair it with
Warm patch on a tile or concrete floor
Heat trail from a hot-water line
Acoustic listening
Cool damp patch on a wall or ceiling
Moisture footprint behind the surface
Moisture meter readings
Stain that returns after painting
Active moisture behind the paint
Acoustic or camera tracing
Suspected slab leak, cold-water line
Often little temperature change
Acoustic listening or tracer gas
Suspected drain leak
Moisture pattern, not the breach itself
Camera inspection
Large wet area, unclear extent
Full spread of moisture
Moisture mapping
The technician walks the suspect area slowly with the infrared camera, watching the live thermogram for anomalies. A leaking hot-water pipe paints a warm plume along its route; a cold supply leak or a patch of trapped dampness appears cooler than the surrounding dry material because evaporating water draws heat away. Water also migrates, it tracks along pipes, joists, and the back of drywall before surfacing somewhere else, so the camera often reveals the leak's path, not just a single point.
Because the scan covers large areas quickly, it is excellent for triage: one pass over a bathroom, laundry room, or slab floor shows which zones deserve closer investigation and which can be ruled out. That alone can save hours of exploratory work.
What the Camera Can, and Cannot, See
An honest note first: a thermal camera does not see through walls, and it does not see water itself. It reads surface temperature, and a trained eye interprets the patterns. Thick insulation, direct sunlight on a wall, or a recently run heating system can all create temperature patterns that look interesting but mean nothing, which is why the scan is done under controlled conditions and every finding is verified.
Verification is non-negotiable. A thermal anomaly is confirmed with a pin or pinless moisture meter pressed to the surface, and often with a second method such as acoustic listening, before anyone marks a spot for opening. Thermal imaging tells you where to look; the moisture meter tells you the water is really there.
Where Thermal Imaging Beats Other Methods
Thermal imaging shines on hot-water and hydronic lines, where the temperature contrast is strongest, a leaking hot supply line under a slab or behind a shower wall practically announces itself. It is also the fastest way to survey large or finished areas: ceilings below upstairs bathrooms, walls behind kitchens, and floors over radiant or recirculation loops.
For deep underground mains or plastic pipework, acoustic listening or tracer gas usually takes the lead, with thermal playing a supporting role at the surface. The methods complement each other, and a good survey uses whichever combination the situation calls for rather than forcing one tool to do everything.
Why It Suits Alhambra's Older Homes
More than 80% of Alhambra's homes are over 30 years old, and many still carry their original plumbing: galvanized steel from the 1930s–60s that corrodes from the inside, cast iron from the 1940s–70s whose joints separate, and copper from the 1960s onward that is prone to pinhole leaks. These failures rarely announce themselves, they seep behind plaster and under tile for months.
In finished homes where every wall opening means patching, texture-matching, and repainting, a non-invasive first look is worth a great deal. A thermal survey maps the moisture before any repair decision is made, so the fix, whatever it turns out to be, starts from evidence instead of guesswork.
Our Thermal Imaging Leak Detection Process
Controlled walkthrough
We review the symptoms and prepare the area, minimizing heat sources and airflow that could skew the readings.
Infrared scan
The camera surveys walls, ceilings, and floors, and we note every temperature anomaly with its location and pattern.
Moisture-meter confirmation
Each anomaly is checked with pin or pinless moisture meters to confirm real moisture versus a thermal false positive.
Source tracing
Confirmed moisture is traced back along its path, to a pipe route, fixture, or entry point, using acoustic or pressure checks if needed.
Documented findings
You receive a clear report of what was found, where, and what the recommended next step is, no vague hand-waving.
How pinpointing changes the job: 5 illustrative examples
The examples below are illustrative. They show how pinpointing typically changes a job. They are not reports of specific customer jobs, and they name no customer, address, date, or price.
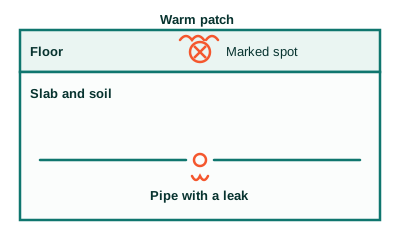
1. A warm spot on the floor
Illustration: Slab cross-section with one marked spot
Before: A homeowner notices one warm patch on the floor and a bill that keeps climbing, but no visible water. Without instruments, the only way to find the leak would be to open large areas of flooring and guess.
Method: The technician checks the meter, isolates the hot-water line, then combines thermal imaging with acoustic listening to follow the heat and sound to one point.
After: The leak is marked on the floor at one spot. Any repair opens that spot only, and the rest of the floor stays intact.
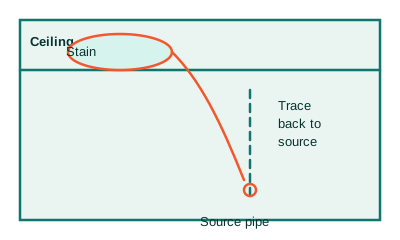
2. A stain on the ceiling
Illustration: Ceiling stain traced back to its source line
Before: A brown stain spreads across a ceiling, but the pipe above it may run several feet away. Opening the ceiling at the stain alone often misses the source and means opening more drywall later.
Method: The technician maps the damp area with thermal imaging and moisture readings, then checks pressure and nearby lines to trace the water back to its source.
After: The source line is identified and marked. Any opening is made where the leak actually is, not where the stain happens to show.
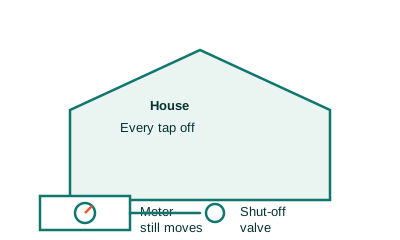
3. A meter that moves with everything off
Illustration: Meter test with every tap off
Before: Every tap is off, yet the water meter still moves. That proves water is leaving the system somewhere, but it says nothing about where. Digging or opening walls at this point would be pure guesswork.
Method: The technician runs a timed meter test, then isolates lines one by one with pressure checks to narrow the loss to a single line.
After: The search area shrinks from the whole property to one line. Pinpointing then focuses on that line only, before anything is opened.
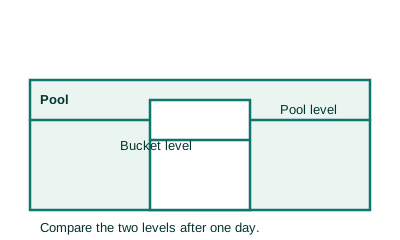
4. A pool that keeps losing water
Illustration: Bucket test comparing pool and bucket levels
Before: A pool loses water faster than normal, but some loss is normal evaporation. Draining the pool or digging up pipes without a test would waste water and money.
Method: The technician runs a bucket test to separate evaporation from a real leak, then pressure tests each line on its own to find which line loses pressure.
After: If the pool is only evaporating, no repair is needed. If one line fails, the search narrows to that line instead of the whole pool system.
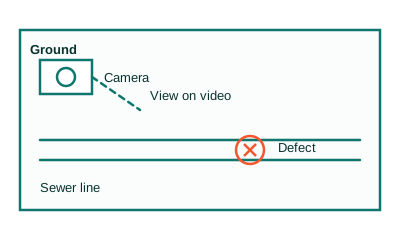
5. Slow drains and a sewer odor
Illustration: Camera inspection showing a defect inside the line
Before: Drains run slow and a sewer odor lingers, but the blockage or break could sit anywhere along the line. Digging to find it would disturb the yard and still might miss the defect.
Method: The technician sends a camera through an existing access point and watches the inside of the line on video, marking where roots, cracks, or offsets appear.
After: The defect is seen on video and its position is known. Any digging happens at that one place, after the cause is already clear.
Frequently Asked Questions
How does thermal imaging leak detection work?
An infrared camera captures surface-temperature differences across walls, floors, and ceilings. Leaking hot water shows as a warm trail; cold-water leaks and damp patches show cooler from evaporation. The resulting heat map reveals where moisture is hiding without opening the structure.
Can thermal imaging detect every type of water leak?
It is highly effective for most hidden leaks, concealed wall pipes, underfloor heating and hot-water lines, ceiling leaks. Very deep underground mains may need acoustic listening or tracer gas alongside it, since the surface signal weakens with depth.
Will the survey damage my property?
No. Thermal imaging is entirely non-invasive and non-contact, the camera simply observes. No holes are cut and nothing is disturbed during the scan itself.
Can a thermal camera see water through a wall?
No, and be wary of anyone who claims otherwise. The camera reads the wall's surface temperature, not what is behind it. Moisture changes that surface temperature, which is what we detect and then confirm with a moisture meter.
How accurate is thermal imaging for finding leaks?
In trained hands it locates moisture within a very small area, but a thermal image alone is never the final word. Every finding is confirmed with moisture meters and, where needed, a second detection method before any opening is made.
Is thermal imaging better than acoustic leak detection?
Neither is universally better, they answer different questions. Thermal excels at hot-water lines and broad moisture surveys; acoustic excels at pinpointing pressurized leaks underground and under slabs. Professionals frequently use both on the same job.