Once a leak is found, a second question matters just as much: how far did the water go? Water migrates through wall cavities, under flooring, and along framing, often well beyond the visible stain. Structural moisture mapping is the systematic measurement of moisture levels across the affected area, plotted onto a floor plan so you can see the full extent of water migration, not just the obvious damage.
This is a diagnostic documentation service. The map shows what is wet, what is damp, and what is dry, information that determines the true scope of repair, supports insurance discussions with quantitative evidence, and prevents the all-too-common outcome of fixing the visible spot while hidden moisture keeps working behind the walls.
Last updated: October 13, 2026
Signs You May Need Structural Moisture Mapping
A leak was found but its full spread is unknown
You need documented evidence of water extent for an insurance claim
Repairs are planned and the true scope must be defined first
Musty odors persist after the visible damage was addressed
A property manager needs a moisture record across units or areas
You want to verify an area is fully dry before rebuilding
Mapping vs. Thermal Imaging: Finding vs. Documenting
The two services are partners with distinct jobs, and the distinction matters. Thermal imaging finds, its infrared camera reveals temperature anomalies that indicate hidden moisture, making it the search tool. Moisture mapping documents, pin and pinless meters take quantitative readings at dozens of points, and those readings are plotted on a floor plan showing exactly where water went and how far it spread.
In practice the sequence runs: thermal scan to locate the affected zones, then systematic meter readings to measure and map them. The thermal image shows you where to measure; the moisture map gives you the numbers, moisture content percentages, boundaries between wet and dry, and a record that stands up to scrutiny.
How a Moisture Map Is Built
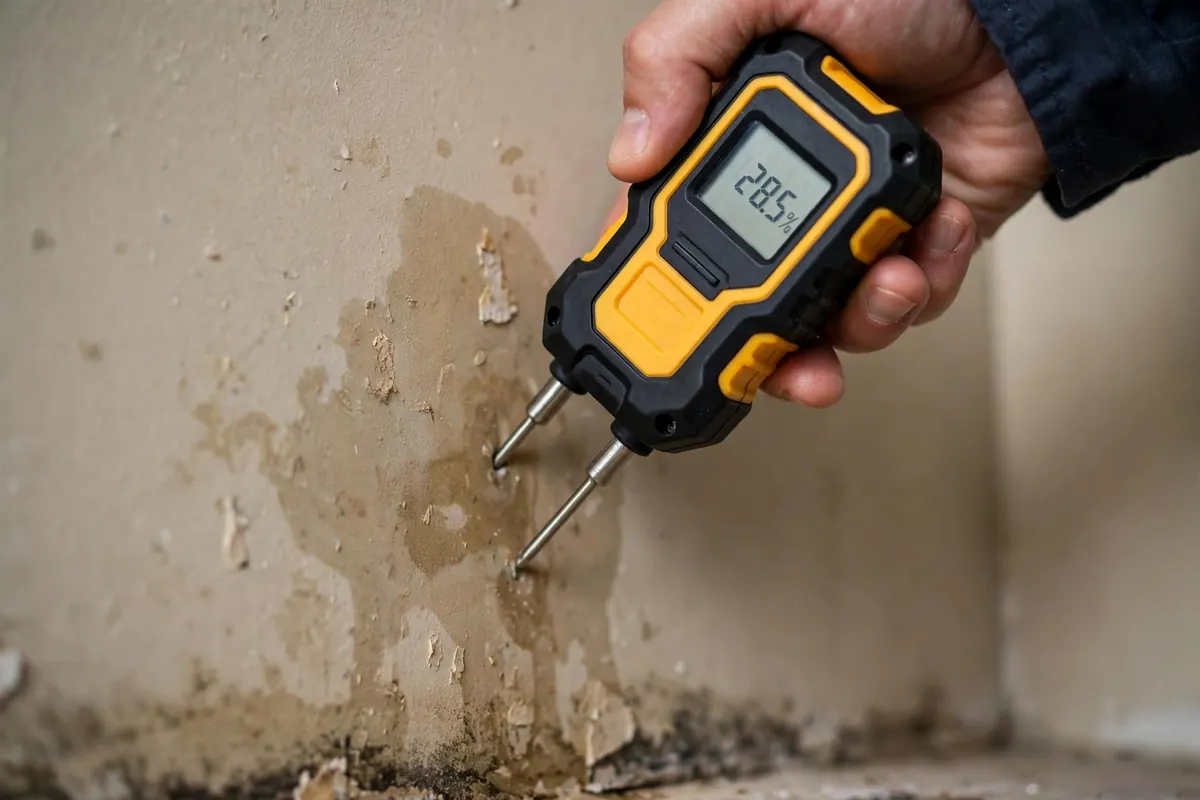
The technician works to a grid, not to hunches. Infrared scanning first outlines the suspect areas. Then pin meters (which measure moisture at depth via small probes) and pinless meters (which scan larger areas non-invasively) take readings across walls, floors, and ceilings, including areas that look perfectly fine. Hygrometers record ambient temperature and relative humidity, since drying conditions affect every reading.
Each reading is logged against its position on an annotated floor plan, producing a visual map: wet zones, marginal zones, and dry zones in clear relation to the leak source. Photographs accompany the readings. The result reads like a survey document, because that is what it is.
The Dry Standard: Why Unaffected Areas Get Tested Too
A question we hear often: why are you testing the dry bedroom when the leak is in the bathroom? Because moisture readings are meaningless without a baseline. Materials vary, what reads as 'elevated' in drywall might be normal for concrete, so the technician establishes the dry standard by measuring unaffected areas of the same materials in the same building.
Every other reading is then judged against that baseline. This is what separates professional mapping from waving a meter around: the map doesn't just say 'wet here,' it says 'wetter than this building's normal by this much, in these exact areas.' That rigor is precisely what adjusters and contractors need.
What the Map Is For, and Isn't
A moisture map serves three purposes: defining repair scope, the contractor knows exactly which areas need attention instead of guessing or over-demolishing; supporting insurance documentation, quantitative, mapped evidence of the water's extent carries weight in claim discussions; and verifying dryness, repeat readings confirm an area has returned to its dry standard before walls are closed up.
What it isn't: restoration. Mapping diagnoses and documents; it does not dry, remediate, or rebuild. We make no restoration or drying claims, the map is the deliverable, and it belongs to you to use with whichever trades handle the repair.
Our Structural Moisture Mapping Process
Thermal reconnaissance
An infrared scan outlines the affected zones and any suspect areas beyond the visible damage.
Dry-standard baseline
Unaffected areas are measured first to establish what 'normal' reads for each material in your building.
Grid measurement
Pin and pinless meters take systematic readings across walls, floors, and ceilings, including areas that look fine.
Map drafting
Readings are plotted on an annotated floor plan showing wet, marginal, and dry zones relative to the source.
Report delivery
You receive the map, the readings, and photographs, documentation ready for contractors, managers, or insurers.
How pinpointing changes the job: 5 illustrative examples
The examples below are illustrative. They show how pinpointing typically changes a job. They are not reports of specific customer jobs, and they name no customer, address, date, or price.
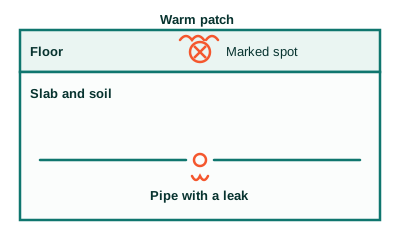
1. A warm spot on the floor
Illustration: Slab cross-section with one marked spot
Before: A homeowner notices one warm patch on the floor and a bill that keeps climbing, but no visible water. Without instruments, the only way to find the leak would be to open large areas of flooring and guess.
Method: The technician checks the meter, isolates the hot-water line, then combines thermal imaging with acoustic listening to follow the heat and sound to one point.
After: The leak is marked on the floor at one spot. Any repair opens that spot only, and the rest of the floor stays intact.
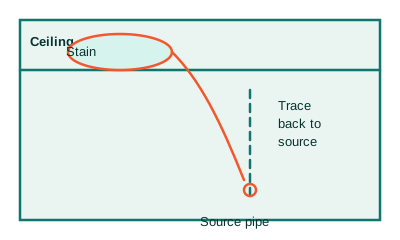
2. A stain on the ceiling
Illustration: Ceiling stain traced back to its source line
Before: A brown stain spreads across a ceiling, but the pipe above it may run several feet away. Opening the ceiling at the stain alone often misses the source and means opening more drywall later.
Method: The technician maps the damp area with thermal imaging and moisture readings, then checks pressure and nearby lines to trace the water back to its source.
After: The source line is identified and marked. Any opening is made where the leak actually is, not where the stain happens to show.
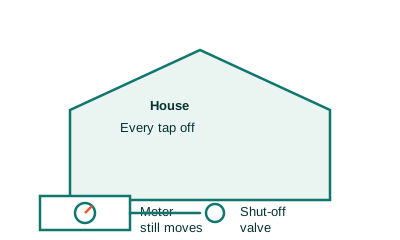
3. A meter that moves with everything off
Illustration: Meter test with every tap off
Before: Every tap is off, yet the water meter still moves. That proves water is leaving the system somewhere, but it says nothing about where. Digging or opening walls at this point would be pure guesswork.
Method: The technician runs a timed meter test, then isolates lines one by one with pressure checks to narrow the loss to a single line.
After: The search area shrinks from the whole property to one line. Pinpointing then focuses on that line only, before anything is opened.
4. A pool that keeps losing water
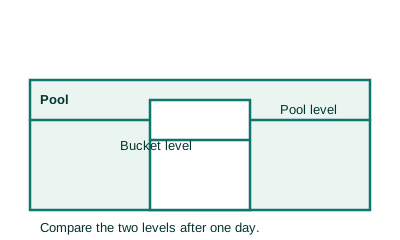
Illustration: Bucket test comparing pool and bucket levels
Before: A pool loses water faster than normal, but some loss is normal evaporation. Draining the pool or digging up pipes without a test would waste water and money.
Method: The technician runs a bucket test to separate evaporation from a real leak, then pressure tests each line on its own to find which line loses pressure.
After: If the pool is only evaporating, no repair is needed. If one line fails, the search narrows to that line instead of the whole pool system.
5. Slow drains and a sewer odor
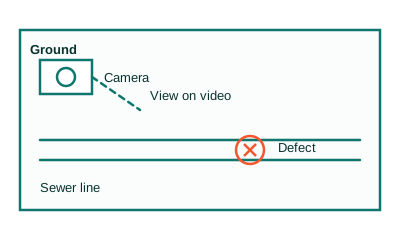
Illustration: Camera inspection showing a defect inside the line
Before: Drains run slow and a sewer odor lingers, but the blockage or break could sit anywhere along the line. Digging to find it would disturb the yard and still might miss the defect.
Method: The technician sends a camera through an existing access point and watches the inside of the line on video, marking where roots, cracks, or offsets appear.
After: The defect is seen on video and its position is known. Any digging happens at that one place, after the cause is already clear.
Frequently Asked Questions
What is structural moisture mapping?
The systematic measurement of moisture levels across an affected area, plotted on a floor plan. It shows exactly where water migrated, wet, marginal, and dry zones, giving you the leak's full footprint rather than just the visible damage.
How is it different from thermal imaging?
Thermal imaging finds hidden moisture by revealing temperature anomalies, it's the search tool. Moisture mapping quantifies and documents the spread with meter readings plotted on a plan, it's the documentation tool. Professional jobs use both in sequence.
What equipment is used?
Infrared cameras for the initial survey, pin meters for depth readings, pinless meters for broad non-invasive scanning, hygrometers for ambient conditions, and annotated floor plans plus photography for the record.
Why do you test areas that look dry?
To establish the dry standard, the baseline reading for each material in your specific building. Without that baseline, no reading can be properly judged as elevated. It also catches migration into areas that look fine but aren't.
Can the map help with my insurance claim?
It provides quantitative, mapped evidence of the water's extent, the kind of documentation adjusters work with. While no document guarantees a claim outcome, a professional moisture map is far stronger than photos of a stain alone.
Does mapping damage my walls?
No. The process is non-invasive, pinless meters scan without contact, pin meters use tiny probes, and thermal imaging is entirely contact-free. Nothing is cut or opened to build the map.