When a sewer or drain line is cracked, root-invaded, or deteriorated along much of its length, the traditional fix is excavation, a trench from the house to the street, through landscaping, driveways, and walkways. Trenchless pipe relining offers a different path: a resin-saturated liner is installed inside the existing pipe and cured in place, forming a smooth, jointless new pipe within the old one, with no continuous trench.
This page explains the method factually: how cured-in-place pipe (CIPP) relining works, which pipes qualify, how it compares to the alternatives, and what the process looks like. A camera inspection always comes first, relining is prescribed from footage, never from guesswork.
Last updated: October 13, 2026
Signs Relining May Be Worth Discussing
A camera inspection shows cracks, root intrusion, or corrosion along long sections
Recurring backups caused by pipe condition rather than a single blockage
An aging clay, cast-iron, or Orangeburg lateral near the end of its life
You want to avoid trenching through landscaping, driveways, or patios
Multiple spot defects too numerous for individual point repairs
A pre-purchase inspection flagged the lateral as deteriorated but intact
How Cured-in-Place Relining Works
The process is methodical. First the host pipe is measured and cleaned so the liner will fit and bond properly. A felt or fiberglass liner is cut to the line's exact length and saturated with epoxy resin. The liner is then inserted, pulled or inverted, into the existing pipe and inflated with air or water pressure, pressing it firmly against the host pipe's interior. Finally it cures, with ambient, hot-water, or steam curing depending on the system, hardening into a rigid, jointless pipe-within-a-pipe.
Only small access points are needed at the line's ends, typically through existing cleanouts. The liner bridges cracks, seals joints against root intrusion, and restores a smooth interior for flow, all without opening the ground along the line's length.
Relining vs. Pipe Bursting vs. Open Trench
Three trenchless-era options cover different situations, and the camera footage decides among them. Relining (CIPP) suits pipe that is damaged but still structurally intact enough to host the liner, cracks, joint failures, root intrusion, corrosion. Pipe bursting suits pipe that is collapsed, severely deformed, or undersized: a bursting head fractures the old pipe outward while pulling a new pipe through behind it. Open-trench replacement remains the answer for severe bellies (sags that relining would simply copy), extreme collapses, or lines needing regrading.
The honest decision logic: one isolated defect favors a spot repair; widespread deterioration in an intact line favors relining; collapse or grade problems favor bursting or trenching. Any contractor recommending a method before seeing camera footage is selling, not diagnosing.
Is Your Pipe a Candidate?
Candidacy depends on material and condition, both established by camera inspection. Clay tile, cast iron, and PVC lines with cracks, joint failures, or root intrusion are commonly relined. What disqualifies a line: full collapse (nothing to host the liner), severe bellies that would be preserved in the new shape, extreme offset joints, or heavy scale that can't be cleaned to a bondable surface.
Diameter and length matter too, residential laterals are the typical application, and the line needs viable access points at its ends. A professional assessment pairs the footage with these criteria and gives you a straight answer, including when relining is not the right call.
What to Expect on the Day
A relining project runs in phases across one or more days depending on length and curing method: cleaning and preparation, liner saturation and installation, curing, then a post-installation camera inspection verifying the new pipe's placement and integrity. Water and drain service interruptions are limited to the work windows, far shorter than the days or weeks of an open-trench replacement.
Because requirements vary by jurisdiction and project, permits, inspections, and contractor qualifications differ, discuss the specifics, paperwork, and warranty terms directly with the contractor performing the work before authorizing anything. Get the scope, the method, and the terms in writing.
Our Trenchless Pipe Relining Process
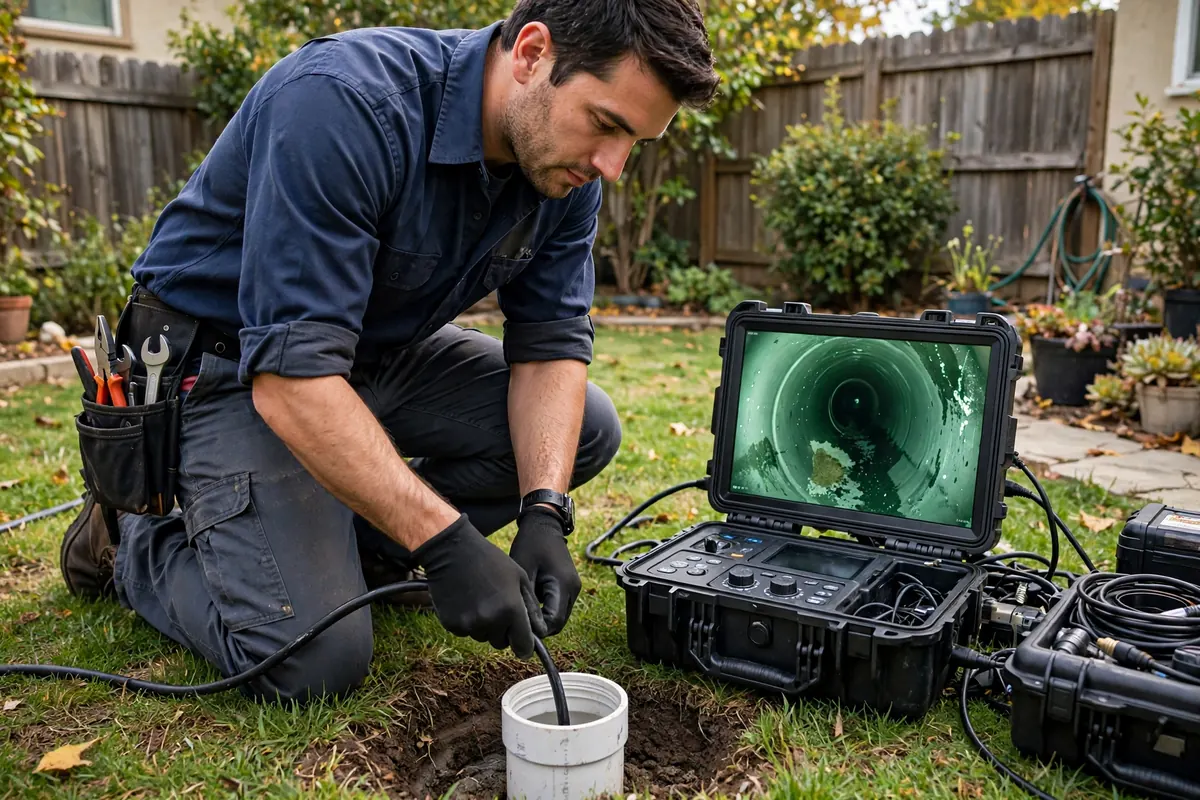
Camera diagnosis
A video inspection establishes the pipe's material, condition, and defect map, relining is never prescribed without footage.
Cleaning and measurement
The host pipe is cleaned to a bondable surface and measured precisely for liner fabrication.
Liner installation
The resin-saturated liner is inserted through small access points and inflated against the host pipe's interior.
Curing
The resin hardens into a rigid, jointless new pipe within the old one, via ambient, hot-water, or steam curing.
Verification
A final camera inspection confirms placement and integrity, and the line is returned to service.
How pinpointing changes the job: 5 illustrative examples
The examples below are illustrative. They show how pinpointing typically changes a job. They are not reports of specific customer jobs, and they name no customer, address, date, or price.
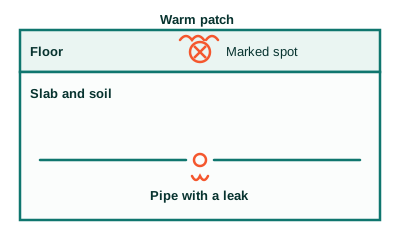
1. A warm spot on the floor
Illustration: Slab cross-section with one marked spot
Before: A homeowner notices one warm patch on the floor and a bill that keeps climbing, but no visible water. Without instruments, the only way to find the leak would be to open large areas of flooring and guess.
Method: The technician checks the meter, isolates the hot-water line, then combines thermal imaging with acoustic listening to follow the heat and sound to one point.
After: The leak is marked on the floor at one spot. Any repair opens that spot only, and the rest of the floor stays intact.
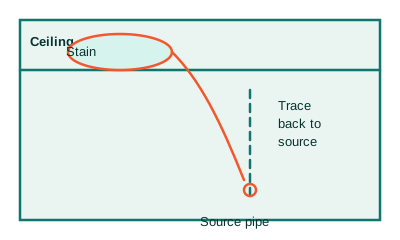
2. A stain on the ceiling
Illustration: Ceiling stain traced back to its source line
Before: A brown stain spreads across a ceiling, but the pipe above it may run several feet away. Opening the ceiling at the stain alone often misses the source and means opening more drywall later.
Method: The technician maps the damp area with thermal imaging and moisture readings, then checks pressure and nearby lines to trace the water back to its source.
After: The source line is identified and marked. Any opening is made where the leak actually is, not where the stain happens to show.
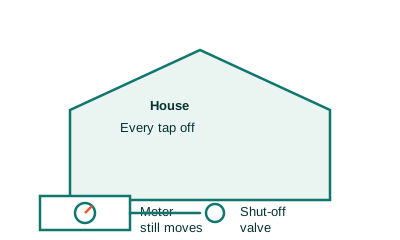
3. A meter that moves with everything off
Illustration: Meter test with every tap off
Before: Every tap is off, yet the water meter still moves. That proves water is leaving the system somewhere, but it says nothing about where. Digging or opening walls at this point would be pure guesswork.
Method: The technician runs a timed meter test, then isolates lines one by one with pressure checks to narrow the loss to a single line.
After: The search area shrinks from the whole property to one line. Pinpointing then focuses on that line only, before anything is opened.
4. A pool that keeps losing water
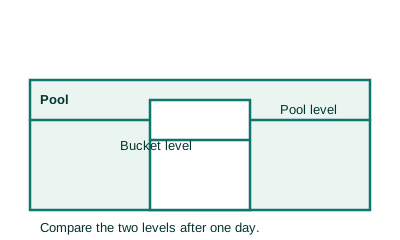
Illustration: Bucket test comparing pool and bucket levels
Before: A pool loses water faster than normal, but some loss is normal evaporation. Draining the pool or digging up pipes without a test would waste water and money.
Method: The technician runs a bucket test to separate evaporation from a real leak, then pressure tests each line on its own to find which line loses pressure.
After: If the pool is only evaporating, no repair is needed. If one line fails, the search narrows to that line instead of the whole pool system.
5. Slow drains and a sewer odor
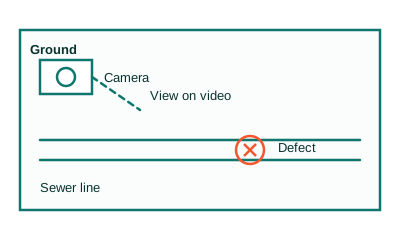
Illustration: Camera inspection showing a defect inside the line
Before: Drains run slow and a sewer odor lingers, but the blockage or break could sit anywhere along the line. Digging to find it would disturb the yard and still might miss the defect.
Method: The technician sends a camera through an existing access point and watches the inside of the line on video, marking where roots, cracks, or offsets appear.
After: The defect is seen on video and its position is known. Any digging happens at that one place, after the cause is already clear.
Frequently Asked Questions
How much does trenchless sewer repair cost?
Published Los Angeles-area figures for CIPP relining range roughly $90–$400 per foot depending on diameter, length, access, and condition, with total project costs commonly in the low-to-mid thousands. These are reported market ranges, any real quote must follow a camera inspection of your specific line.
How does pipe relining actually work?
The pipe is measured and cleaned, a liner saturated with epoxy resin is inserted through small access points, inflated to press against the old pipe's interior, and cured until hard, leaving a smooth, jointless new pipe inside the old one.
Relining vs. pipe bursting, which does my line need?
Relining fits damaged-but-intact pipe (cracks, joint failures, root intrusion). Bursting fits collapsed, deformed, or undersized pipe where there is nothing to line. Severe bellies or grade problems may still need open excavation. Camera footage makes the call.
Can my pipe be relined?
Clay, cast iron, and PVC lines with cracks, joint failures, or root intrusion often qualify. Full collapse, severe bellies, extreme offsets, or un-cleanable scale usually disqualify a line. A camera inspection against these criteria gives the definitive answer.
Is trenchless really 'no dig'?
There is no continuous trench along the line's length, that is the point. Small access pits or existing cleanouts at the line's ends are still used for liner insertion. Compared to open-trench replacement, surface disruption is minimal.
How do I choose a contractor for this work?
Require a camera inspection with footage you keep, a written scope naming the exact method and liner system, clear warranty terms, and direct answers about permits and qualifications for your jurisdiction. Compare the footage-based diagnosis across bids, not just the price.