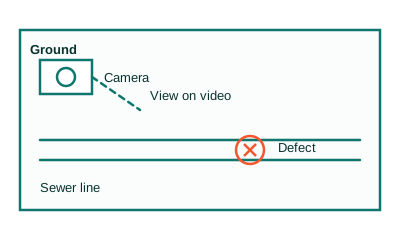
Not every damaged pipe needs its full length rehabilitated. Often a camera inspection reveals a lateral that is fundamentally sound except for one problem: a single cracked section, one failed joint, one root intrusion point. Targeted spot pipe repair, also called point repair, sectional lining, or a short liner, fixes just that defect from inside the pipe, leaving the healthy remainder untouched.
It is the most surgical option in the trenchless family: a short cured-in-place sleeve, typically a few feet long, installed exactly where the camera found the problem. Less material, less time, less cost than full-length lining, when the diagnosis genuinely supports it.
Last updated: October 13, 2026
Signs Spot Repair May Be the Right Call
A camera inspection found one isolated crack or failed joint
A single root intrusion point in an otherwise sound line
One offset joint causing repeated blockages at the same spot
A pre-purchase scope flagged a lone defect in a healthy lateral
You were quoted full relining but the footage shows limited damage
A previous repair left one section that needs corrective attention
What a Point Repair Actually Is
A spot repair is cured-in-place technology scaled down to a single location. A short liner, typically two to four feet, is saturated with resin, positioned over the defect using the camera for guidance, and expanded with a packer (an inflatable bladder) that presses it against the pipe wall. Once cured, it forms a structural patch bonded to the host pipe on both sides of the defect, bridging the crack or failed joint.
Installation happens entirely from inside the pipe through existing access points. There is no trench for the repair itself, no excavation along the line, the surface above never gets disturbed. The terminology varies by contractor, point repair, spot repair, sectional liner, short liner, pipe patch, but the concept is identical: fix the defect, spare the line.
Spot Repair vs. Full Lining: The Decision
The camera footage makes this call, and the logic is straightforward. Spot repair fits one isolated defect in an otherwise healthy line, a single crack, one bad joint, one intrusion point. Full-length relining fits widespread deterioration: cracks at multiple joints, root intrusion at several points, general corrosion along the run. Neither fits a collapsed section or a severe belly, those need bursting or excavation.
Be cautious in both directions. Recommending full relining for a single defect oversells; recommending a spot repair when the footage shows five failing joints undersells and guarantees a return visit. The defect count on the video is the honest arbiter, ask to see it and count with the technician.
How Installation Works
After the defect's exact position is confirmed, camera footage plus above-ground locating so the crew knows precisely where they are working, the line is cleaned at the repair zone to ensure the patch bonds. The resin-saturated short liner is loaded onto the packer, navigated to the defect under camera guidance, and the packer is inflated, pressing the liner firmly against the pipe interior across the damaged area.
Curing follows, ambient or accelerated depending on the system, and then the packer is deflated and withdrawn, leaving the structural sleeve in place. A final camera pass verifies the patch's position and seal. The whole procedure is typically completed within a single work session, with the line returned to service the same day.
When the Camera Finds More Than One Problem
Honesty cuts both ways: sometimes the 'single defect' turns out to have company. If the camera reveals multiple failing joints or cracks spread along the line, individual spot repairs stop making sense, two or three patches approach the cost of a full liner while leaving the remaining weak joints to fail later.
A straight assessment will tell you when the defect count crosses that line and recommend full-length relining instead. That recommendation should come with the footage to back it up, timestamps and defect locations you can verify yourself. The goal is the right repair at the right scope, not the smallest invoice today followed by the same problem next year.
Our Targeted Spot Pipe Repair Process
Camera verification
Footage confirms a single isolated defect in an otherwise sound line, the qualifying condition for spot repair.
Defect locating
Above-ground tracking marks the defect's exact surface position so the crew works at precisely the right point.
Zone cleaning
The repair zone is cleaned to ensure the resin sleeve bonds solidly to the host pipe.
Sleeve installation
The resin-saturated short liner is positioned over the defect by camera guidance and expanded with a packer.
Cure and verify
The patch cures into a structural sleeve; a final camera pass confirms position and seal before the line returns to service.
How pinpointing changes the job: 5 illustrative examples
The examples below are illustrative. They show how pinpointing typically changes a job. They are not reports of specific customer jobs, and they name no customer, address, date, or price.
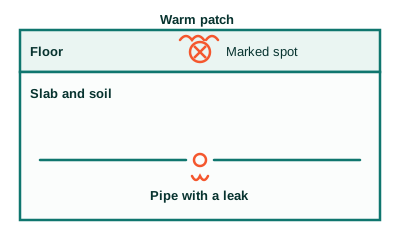
1. A warm spot on the floor
Illustration: Slab cross-section with one marked spot
Before: A homeowner notices one warm patch on the floor and a bill that keeps climbing, but no visible water. Without instruments, the only way to find the leak would be to open large areas of flooring and guess.
Method: The technician checks the meter, isolates the hot-water line, then combines thermal imaging with acoustic listening to follow the heat and sound to one point.
After: The leak is marked on the floor at one spot. Any repair opens that spot only, and the rest of the floor stays intact.
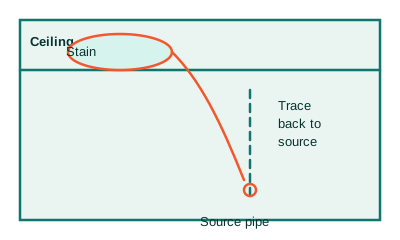
2. A stain on the ceiling
Illustration: Ceiling stain traced back to its source line
Before: A brown stain spreads across a ceiling, but the pipe above it may run several feet away. Opening the ceiling at the stain alone often misses the source and means opening more drywall later.
Method: The technician maps the damp area with thermal imaging and moisture readings, then checks pressure and nearby lines to trace the water back to its source.
After: The source line is identified and marked. Any opening is made where the leak actually is, not where the stain happens to show.
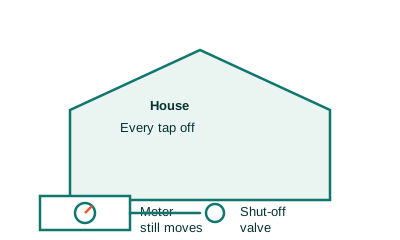
3. A meter that moves with everything off
Illustration: Meter test with every tap off
Before: Every tap is off, yet the water meter still moves. That proves water is leaving the system somewhere, but it says nothing about where. Digging or opening walls at this point would be pure guesswork.
Method: The technician runs a timed meter test, then isolates lines one by one with pressure checks to narrow the loss to a single line.
After: The search area shrinks from the whole property to one line. Pinpointing then focuses on that line only, before anything is opened.
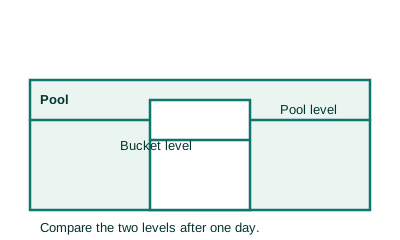
4. A pool that keeps losing water
Illustration: Bucket test comparing pool and bucket levels
Before: A pool loses water faster than normal, but some loss is normal evaporation. Draining the pool or digging up pipes without a test would waste water and money.
Method: The technician runs a bucket test to separate evaporation from a real leak, then pressure tests each line on its own to find which line loses pressure.
After: If the pool is only evaporating, no repair is needed. If one line fails, the search narrows to that line instead of the whole pool system.
5. Slow drains and a sewer odor
Illustration: Camera inspection showing a defect inside the line
Before: Drains run slow and a sewer odor lingers, but the blockage or break could sit anywhere along the line. Digging to find it would disturb the yard and still might miss the defect.
Method: The technician sends a camera through an existing access point and watches the inside of the line on video, marking where roots, cracks, or offsets appear.
After: The defect is seen on video and its position is known. Any digging happens at that one place, after the cause is already clear.
Frequently Asked Questions
What is a trenchless point repair?
A short cured-in-place sleeve, typically a few feet long, installed inside the pipe directly over a single defect such as a crack or failed joint. It cures into a structural patch bonded to the host pipe on both sides, with no trench dug for the repair.
When is spot repair the right choice?
When camera footage shows one isolated defect in an otherwise healthy line. It is the most economical trenchless option in that scenario, and the wrong option when defects are widespread, in which case full-length lining is the honest recommendation.
How much does a sewer spot repair cost?
Published figures for isolated trenchless point repairs range roughly $3,000–$5,000 for a typical two-to-four-foot repair, varying with depth, access, and diameter. These are reported market ranges, a real quote follows a camera inspection of your line.
Spot repair vs. full pipe lining, which do I need?
Count the defects on the camera footage: one isolated defect favors spot repair; multiple cracks, joints, or intrusion points favor full lining; collapse or severe bellies favor bursting or excavation. The footage decides, not the sales pitch.
Does spot repair require digging?
No trench is needed for the repair itself, the sleeve is installed from inside the pipe through existing access points. That is the core advantage over open-cut repair for an isolated defect.
What if the camera finds multiple bad spots?
Then spot repair is usually the wrong scope. Multiple defects generally mean longer liner sections or full-length relining is more economical and more durable than patching each spot individually. A straight contractor will show you the footage and say so.