
When a commercial property's water bill climbs with no change in occupancy or operations, the stakes are higher than in a home: the systems are bigger, the bills are bigger, and the leak could be hiding anywhere across the site, irrigation, cooling, fire suppression loops, restrooms, kitchens, or underground mains. Guessing is expensive. A systematic investigation is not.
Last updated: October 13, 2026
How do you find a water leak in a commercial building?
The logic is the same as residential detection, scaled up: confirm the loss is real, narrow it to a system, then pinpoint the source. The difference is organization, with multiple meters, tenants, and systems in play, you need a plan before anyone touches a valve. Random checking across a large property wastes days; a structured sequence usually finds the zone within hours.
Start with a water audit
Before any fieldwork, build the paper picture:
- Pull twelve to twenty-four months of water bills and chart usage, not just cost. Find the month the trend broke, that is when the problem started.
- Inventory every meter, domestic, irrigation, cooling tower makeup, and any submeters. Know which meter serves which system; many properties cannot answer this on day one.
- List the big water users: cooling towers, irrigation zones, commercial kitchens and laundries, pools or fountains, and fire suppression systems.
- Check for operational changes around the time usage rose: new tenants, landscape changes, equipment replacements, or construction nearby.
This step alone often solves the mystery, a cooling tower stuck in constant bleed, or an irrigation controller reset by a power outage, explains a large share of "unexplained" commercial water loss.

Isolate by zone
With the audit done, use the meters as diagnostic tools. Shut down or valve off one system at a time, irrigation first (the most common culprit), then cooling, then building zones floor by floor, and watch the main meter between each step. When the meter stops moving, you have found your zone. Document every reading with the date and time; that log becomes the backbone of the investigation and the evidence you will show ownership later.
Where possible, run isolation tests during low-activity hours, early morning or overnight, so normal tenant usage does not muddy the readings. And coordinate with building occupants before shutting zones: a floor without water, even briefly, generates complaints fast. A short notice explaining that you are tracking a suspected leak usually buys full cooperation.
What is a water audit for a building?
A water audit is simply a structured accounting of where every gallon goes: metered supply in, broken down by system and end use, compared against expected consumption. It requires no special equipment, just bills, meter readings, and knowledge of the building's systems. For ongoing management, many properties repeat a light version quarterly. Catching a new leak in month one instead of month six is worth the modest effort, and the historical record makes each future investigation faster.
How often should a commercial property do a leak survey?
There is no universal rule, but properties with aging infrastructure, extensive irrigation, or a history of underground leaks benefit from periodic professional surveys, annually is a common cadence for larger sites. A professional survey brings tools most facilities do not own: acoustic ground microphones for underground mains, tracer gas for quiet or deep leaks, and thermal imaging for hidden moisture, plus a written report with marked leak locations and documentation suitable for owners and insurers.
What should a facility manager document after finding a leak?
Document everything while it is fresh: dated meter readings before and after, photographs of visible signs, the isolation steps you took and their results, any professional survey reports, and repair invoices. This file supports insurance claims, justifies capital requests to ownership, and, if your water provider offers any leak adjustment program, is exactly the documentation they will ask for. Ask your provider about their policy directly rather than assuming one exists.
If your Alhambra commercial property is losing water and the audit points to a hidden leak, our commercial water loss surveys bring the detection technology and the documentation together in one visit. Call +1 626-898-6221, we are open 24 hours.
Related service: Commercial Water Loss Surveys in Alhambra, CA
How pinpointing changes the job: 5 illustrative examples
The examples below are illustrative. They show how pinpointing typically changes a job. They are not reports of specific customer jobs, and they name no customer, address, date, or price.
1. A warm spot on the floor
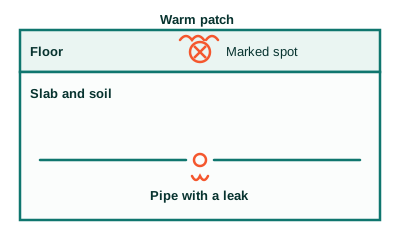
Before: A homeowner notices one warm patch on the floor and a bill that keeps climbing, but no visible water. Without instruments, the only way to find the leak would be to open large areas of flooring and guess.
Method: The technician checks the meter, isolates the hot-water line, then combines thermal imaging with acoustic listening to follow the heat and sound to one point.
After: The leak is marked on the floor at one spot. Any repair opens that spot only, and the rest of the floor stays intact.
2. A stain on the ceiling
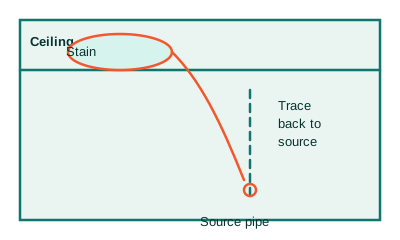
Before: A brown stain spreads across a ceiling, but the pipe above it may run several feet away. Opening the ceiling at the stain alone often misses the source and means opening more drywall later.
Method: The technician maps the damp area with thermal imaging and moisture readings, then checks pressure and nearby lines to trace the water back to its source.
After: The source line is identified and marked. Any opening is made where the leak actually is, not where the stain happens to show.
3. A meter that moves with everything off
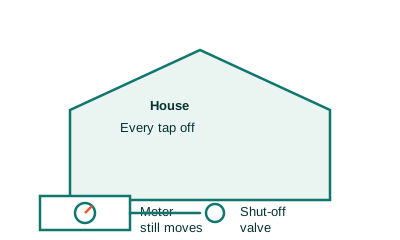
Before: Every tap is off, yet the water meter still moves. That proves water is leaving the system somewhere, but it says nothing about where. Digging or opening walls at this point would be pure guesswork.
Method: The technician runs a timed meter test, then isolates lines one by one with pressure checks to narrow the loss to a single line.
After: The search area shrinks from the whole property to one line. Pinpointing then focuses on that line only, before anything is opened.
4. A pool that keeps losing water
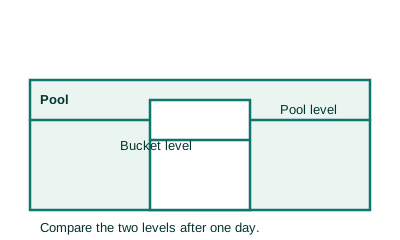
Before: A pool loses water faster than normal, but some loss is normal evaporation. Draining the pool or digging up pipes without a test would waste water and money.
Method: The technician runs a bucket test to separate evaporation from a real leak, then pressure tests each line on its own to find which line loses pressure.
After: If the pool is only evaporating, no repair is needed. If one line fails, the search narrows to that line instead of the whole pool system.
5. Slow drains and a sewer odor
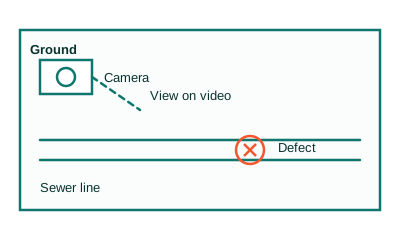
Before: Drains run slow and a sewer odor lingers, but the blockage or break could sit anywhere along the line. Digging to find it would disturb the yard and still might miss the defect.
Method: The technician sends a camera through an existing access point and watches the inside of the line on video, marking where roots, cracks, or offsets appear.
After: The defect is seen on video and its position is known. Any digging happens at that one place, after the cause is already clear.